
Finding good tenants for a rental property is arguably one of the most essential tasks that a self-managing landlord must accomplish. You’re searching for a high-quality tenant that will pay on time, take care of the property, and be easy to communicate with all while trying to get the most amount of rent and filling the vacant unit as quickly as possible.
That’s no small feat! So, how can you find good tenants for your rental property?
The keys to finding good tenants for a rental property are to price the unit fairly, keep the property well-maintained and updated, publish high-quality photos on several listing sites, require a background and credit check from all applicants over 18, and be patient throughout the process.
With those main points in mind, I’ll cover everything you need to know to find a high-quality tenant below. Consider this your “Unit Turnover Checklist” – this is the exact list I follow whenever we have a vacancy. I’ve also linked to a ton of other articles that will help you dive deeper into a specific topic if you are unsure about what I’m referring to.
Let’s dive in!
Quick Navigation: Unit Turnover / Tenant Screening Process Checklist & Guide
- Turnover The Home & Deep Clean
- Before Listing The Home
- Create The Listing
- Respond To Potential Applicant Inquiries
- Review Each Application As It Gets Submitted
- Schedule A Showing For Approved Applicant(s)
- Show The Home
- Deny Other Applicant(s)
- Schedule The Lease Signing Appointment
- Attend The Lease Signing
- Deposit Move-In Funds
- File All Documents
- Final Thoughts
- Related Content
1. Turnover The Home & Deep Clean
The first few tasks that need to be done before you can fill your vacant unit are:
- Fill out the Move-Out Condition Report and take pictures
- Repair anything that’s broken or needs updated
- Deep clean the entire home
Fill Out The Move-Out Condition Report & Take Pictures
Whenever a tenant moves out, you want to fully inspect the home and take pictures of every room for your records. These pictures along with this report will give you a black-and-white list of deductions you can take from the security deposit AND they will protect you from any legal suits in the future if the tenant ever decides you fight you on your deductions.
Several items we check for are:
- Inspect the refrigerator, stove, dishwasher, garbage disposal, microwave, A/C, furnace or baseboard heaters, and hot water heater to make sure each works properly
- Replace the furnace filter(s)
- Check for leaks under the sinks (run water in all sinks/shower for 5-10 min)
- Flush the toilet(s) and run water in the shower/bathtub
- Check/replace all light bulbs and smoke/carbon monoxide detector batteries (change the batteries every time if not hardwired)
- Check the ceiling in all rooms for any signs of leaks
- Look for infestations of bugs (ants, mud tracks from termites, etc) around doors, windows, and in the kitchen
- Take detailed pictures of every room, inside cabinets and closets, and all appliances (up close, inside and out) for our records (take pictures specifically of anything that is broken or damaged)
If you want more information on what a Move-Out Condition Report is or what you should be checking for/taking pictures of, then check out my other article.
We also change all of the door codes to new ones that we will supply the next tenants with (and also prevent the old tenants from re-entering). If we are supplying a physical key, then we also make a single copy to the front door that we will supply the future tenant with as well.
Repair/Update Broken/Worn Items
As we walk around the home, we keep a list of any items that need to be repaired or updated. For example, we often have to:
- Replace or install blinds
- Resecure curtain rods that have come loose from the wall
- Paint walls where holes have been spackled
- Replace dated appliances
- Replace carpet with Luxury Vinyl Plank flooring (if the carpet is dated/needs replaced)
- Replace old front door knobs with new electronic deadbolts (if we haven’t done that yet)
- Update all outlets and covers to white
- Install GFCI outlets in the kitchen, bathrooms, and laundry room/utility room
- Clean up the landscaping/cut back trees from the house
Some of these repairs, we have to do during every unit turnover (such as replacing the blinds, resecuring the curtain rods, and painting) while others we only have to do when they fail or are 15-20 years old (such as replacing dated appliances or replacing carpet).
Before the previous tenant moves out, we give them a Move-Out Checklist that explains all of the tasks we expect to be completed before they leave if they want their full security deposit back.
By providing this checklist along with the rest of the Move-Out Packet, the tenants have a clear idea of what you expect from them, so oftentimes they leave the home in as good of condition as you gave it to them.
Once we have our list, we go get supplies from the local hardware store and get to work on repairing each item.
Note: We really enjoy doing DIY work on our rentals, so we choose to save money when the unit is vacant by doing the repairs ourselves. Then when we have a tenant in place, we choose to pay for handymen and outside contractors to do the work.
Balancing the work this way saves us money on the big turnovers while saving us tons of time when the home is occupied. If you are not into DIY work, then you can hire out all of the repairs using the Thumbtack app or from the list of contractors you’ve accumulated over the years.
Deep Clean The Home
Finally, once all of the repairs are complete, we deep clean the home. Several of those tasks include:
- Cleaning inside of all of the appliances
- Cleaning out the cabinets and wiping them down
- Cleaning all of the countertops and mirrors
- Wiping down the baseboards and mopping the floors
- Deep cleaning the carpets with a RugDoctor
Again, with the Move-Out Checklist we supply our tenants, most of these items are already complete, so we don’t have to do them. If we had some repairs, though, we tend to make a small mess, so that’s where most of the cleaning comes into play.
I have a bundle of editable templates, email drafts, and checklists you can purchase that will help you with every aspect of self-managing your rental homes. Check out The DIY Rental Manager Template Bundle here. [COMING SOON]
2. Before Listing The Home
Now that we’ve got the home ready to be lived in again, it’s time to prepare to list it for rent. Before we list it, we always:
- Take photos and videos of the inside and outside of the home
- Determine the rent price
- Write the listing description
- Create/update the Property Packet for showings
- Create/update the email draft we will send to prospective applicants
- Create/update our Calendly showing availability
Take Professional Photos Of The Property
At this point, you can either hire a professional Real Estate Photographer OR you can take your own listing photos with your phone.
We prefer to take the photos ourselves because we can update them as frequently as we want and we can save some money in the process. The last thing you want to do, however, is look like an amateur photographer with poor-quality listing photos.
Oftentimes, potential applicants don’t even read the listing description – they only look at the pictures. So you want your pictures to tell the whole story.
For more help on how to take beautiful listing photos with your phone, check out my other article.
I also find having really great photos of the property has helped me answer potential applicant questions and future tenant questions more easily. One time, we had a new tenant ask about “getting the internet hookup port in the kitchen enlarged so their wifi cord could plug in”.
Since we just had a tenant living there for over a year that had internet without any problems, this question baffled me. So naturally, I started sifting through my photos to see what they could be referring to in the kitchen.
Turns out, they were trying to plug their ethernet cable into an old phone jack instead of using the coax cable in the living room to hook up their modem. (We laughed about that one for a while haha.) If we hadn’t had those detailed pictures, I would have had to have more communication with the tenant and potentially have to send somebody out there to see what they were talking about.
The moral of the story is always to take more photos than you think you will need!
Determine The Rent Price
Before you can list your home for rent, you need to determine your rent asking price. After doing this for several years, we’ve found the best price is the price that is just under the market average.
This price still gets us a high enough rent amount, but also gets us more qualified applicants because they feel like they are “getting a deal compared to other rentals on the market”. Plus, pricing the rent this way lets us fill the unit significantly faster (and with a higher quality tenant) than if we tried to go for a premium rent price.
To find what the market average is for our rentals, we use Apartment.com’s Rent Pricing Report. (This is one of the free reports they provide when you use their rental manager tools.) This report gives us a range of rentals that were recently filled and the rent prices they actually received. It also gives us their addresses, distance from our rental, number of bedrooms, and other items we need to determine how our rental stacks up to the others on the market.
The report also tells you how long other vacant units are sitting on the market today before they are filled so you can get a better idea of how long this process is going to take. If you choose to list the property below the average as we do, then you’ll most likely be under this average time.
For more information on how to price a rental unit to get the best applicant pool along with some examples of our pricing strategy, check out my other article.
In the past, we have listed our units at more premium prices, waited for a few weeks, then ended up dropping the price anyway when we weren’t getting qualified applicants. If we had just started at a lower price, we could have saved a few weeks of vacancy. And we all know, vacancies are money-sucks on a rental portfolio.
Write The Listing Description
As I said before, most potential applicants look at the pictures more than they read the listing description. However, some of the more detail-oriented applicants do read the listings, so you want them to feature all of the important information.
Plus, the more info you can add to the listing description, the fewer questions you will receive from potential applicants. We like to “lay it all out upfront” so there’s no confusion or deception on what they are getting if they rent from us.
Some of the items we include in our listing description are the:
- Address of the property (this is optional – you could give a general location instead if you are worried about security purposes)
- Rent price
- Security deposit amount
- Application fee
- Lease term
- Utilities paid by the resident
- Utilities paid by the owner
- Lawncare responsibility
- Pet Policy (and any pet fees spelled out)
- Smoking Policy
- Occupancy Policy (limit to 2 people per bedroom)
- Description of the home in paragraph form (talk about the recent upgrades, the proximity to other amenities, and any other big selling points of the home)
- Explanation of how rent can be paid (online only, by check, money order, etc)
- What move-in funds will be required if they are approved (security deposit, first month’s rent, etc)
- Minimum screening qualifications (income, background check, credit check, etc)
- What they should do if they want more information (email, call, etc)
We also use all of these items and descriptions to create a Property Packet that we pass out at showings and an email draft that we send to potential applicants that are inquiring about more information.
I write this listing out in a Google Doc and save it in our Google Drive for future reference (just in case something ever happens to the listing, you won’t have to rewrite everything).
For more help on how to write an awesome listing description with tons of examples, check out my other article.
Create A Property Packet For Showings
Property Packets are a 2-3 page packet that contains all of the details in your listing description plus the next steps for any potential applicants who want to apply. They also typically include a Release Of Information Consent Form that you want any potential applicants to sign at the end of the showing.
This Release Of Information Consent Form states that the applicant is permitting you to review their background and credit history to qualify them for this rental.
Some potential applicants view several rentals on the same day when they are house hunting. When several rentals are viewed at the same time, it’s hard to remember the differences between them. Since we want our rental to stand out, we supply each person over 18 years old with a Property Packet that they can take home with them.
It helps them remember which property they viewed plus all of the important details they need to make a decision. And giving out a Property Packet that has your business logo on it just looks super professional in my opinion. Most landlords won’t take this extra step, but we’ve found it to be super helpful in finding great tenants.
For more help on how to create a Property Packet for a showing, check out my other article.
Create The Email Draft We Will Send To Prospective Applicants
Before we list a home, we also draft up an email that we will send out to every prospective applicant. It also has all of the same information as the listing description and the property packet. But it also has a link that takes them directly to the application, a link for other Frequently Asked Questions we get about renting from us, and what they have to do to get a showing scheduled with us.
We typically require applications to be submitted before we will schedule a showing to save ourselves significant time. We only want to show the home to serious applicants, so doing things in this order removes a lot of the “window shoppers” that we otherwise would encounter.
Whenever we get an inquiry from a potential applicant, we simply copy and paste this entire email and send it to them. Most people read the screening requirements and don’t apply or ask any further questions. This is great! That means you know you’ve provided enough information because nobody needs to ask you follow-up questions.
Creating this email draft upfront saves us several hours of extra communication during the unit turnover process.
Create/Update Our Calendly Showing Availability
Finally, the last thing we do before we create the listing is to update our Calendly showing availability.
To schedule showings, we love to use Calendly (a free software) because it lets us set up dates and times that we are available. Then we can email any applicants that we want to schedule a showing with the Calendly link, and they can look at our calendar and choose the date and time that works best for them.
Using this software saves us tons of time going back and forth on dates and times we and the applicants are available for a showing.
Once we have our Calendly event set up, we just simply change the dates and times we are available the next time we use it and turn it back on for anyone to schedule it. Once we are done with showings, we turn it off so no more appointments can be booked, and we keep it for the next time we have a vacancy.
We like to schedule 1-hour blocks of time on 2 separate days (one weekend and one weekday) to give the applicants a few times to choose from. Showings typically take 10 minutes, so within each hour block, the applicant can choose any 10-minute time block that they want to come to see the house.
For example, we offer 10-minute showings on Thursdays from 5 pm – 6 pm and Saturdays from 12 pm to 1 pm.
Once they’ve chosen a time, we get an email and the showing is added to our calendar. Super simple!
Now that we’ve done all the prep work (which is the most time-consuming part), we are ready to create and publish the listing.
3. Create The Listing
Since you already have your photos taken, your listing description written, and your rent price chosen, all you have to do is upload it all to the listing website of your choice.
We like to list on two different websites: Apartments.com and Zillow.com. Both of these platforms also publish on other listing websites (such as Trulia, HotPads, etc), so by listing on these two sites, we get published on a total of 15 sites.
Zillow is by far, the most popular place to search for a rental in our market (southern Ohio), so we know we must list there (even though we like to manage our tenants on Apartments.com better). For your market, Apartments.com might be more popular, and Craigslist or another website might be more popular.
Be sure to list whichever website is most frequently used in your market to get the best results. To find this out, you might have to search some forums on Facebook or the internet to see where people are searching for places to rent.
Sometimes we are hoping to get a Section 8 tenant, a military tenant, or a college student tenant specifically, so we also list on websites that will target those types of tenants specifically as well. To learn more about listing on different websites to get different types of tenants, check out my other article.
Once you’ve chosen your listing websites, take all of the photos and listing descriptions you’ve already created and plug them into the website. Then hit publish. Now, you’re off to the races!
Up to this point, it will probably take you 2-3 hours to get all of this set up initially. But the next time this unit becomes vacant, it will take you 15-20 minutes to change the rent price and publish everything again. So I HIGHLY recommend you take the time now to get it all set up correctly.
4. Respond To Potential Applicant Inquiries
Once your listings are published, there’s not much else to do until you get an inquiry on your listing. We usually get 3-5 inquiries per day asking for more information. At that point, I just copy and paste our email draft and send it to them via however they inquired.
For Zillow, it’s through their messaging portal. For Apartments.com, it’s a separate email.
If any of these potential applicants are ready to move on to the next step, they will submit an application on either Apartments.com or Zillow.
Both websites charge a small application fee to the applicant that grants you access to review their application information, background report, and credit report. These reports are dire to help you find good tenants for your rental property. The best part is you don’t have to pay for it, the applicant does!
5. Review Each Application As It Gets Submitted
Now, we are at the fun part. To find good tenants for your rental property, you must screen them. Screening applications include:
- Verifying their income
- Reviewing their eviction history
- Reviewing their criminal history
- Reviewing their credit history
- Understanding their household situation and reasons for moving
We screen our applications on a first-come-first-serve basis. Whichever applicant passes all of our minimum screening standards, schedules a showing, and accepts the offer first gets to rent the home.
Since we require applications to be submitted before a showing, we typically sift through 20-30 applications to find one application that meets our minimum requirements. Then we immediately invite them to schedule a showing, and they typically accept the offer before we get a second application that meets all of those requirements.
If there ever is a time when we have two applicants that are fully qualified and schedule a showing on the same day, we will offer the home to the most qualified applicant first (based on our minimum screening requirements). Then if that applicant does not accept the offer, we will move on to the next applicant.
Our minimum screening requirements are:
- Household income must be 3x the rent price and come from a verifiable source
- No evictions on their record ever
- All positive references from previous landlords
- No felonies/violent crimes within the last 8 years
- Credit score must be a minimum of 600 with no collections and no open delinquent loans on their record
- Must be a non-smoker
- Occupancy is limited to 2 people per bedroom
All persons over 18 living in the home must meet these minimum qualifications for us to approve their application and schedule a showing.
For more information on why we chose these screening standards and how you can adjust them for your rental, check out my other articles (income & employment verification, rental history, credit history, background history).
6. Schedule A Showing For Approved Applicant(s)
After we find an applicant who meets all of our minimum screening standards, we send them an email with the Calendly link we created earlier inviting them to schedule a showing.
When the applicant clicks that link, they can see all of the available dates and times we offer showings, and they can see further instructions they must follow.
For example, we require anyone who has scheduled a showing to text us 1 hour before their showing time confirming they will be at the showing. We tell them upfront that if no one texts us, then no one will be at the showing to let them in.
These instructions do two things for us:
- It ensures we won’t have a no-call-no-show situation (we don’t want to waste our own time driving to the property if the applicant is going to cancel and can’t have to courtesy of telling us)
- It shows whether the potential tenant can follow directions or not
Half the battle of property management is training tenants on your rules. If the first thing the applicant does is blatantly not follow your rules when they are “trying to put their best foot forward”, then that’s a red flag that they’ll not follow other rules you set in place during the tenancy.
Once the applicant chooses a showing time, we get an email of the appointment time and it automatically gets added to our Google Calendar. At this point, we don’t have much else to do until the showing.
7. Show The Home
Finally, it’s time to do a showing! There are a few things that need to be taken care of before the applicant arrives at the showing.
Before The Showing
Before showings, we always like to:
- Print off a Property Packet for each applicant over 18
- Arrive 15 minutes early
- Turn on all of the lights
- Open all of the windows
- Unlock all of the doors
- Turn the thermostat up to 72 degrees in the winter or down to 68 degrees in the summer
Doing these small tasks before the potential tenant arrives makes the showing go much smoother. You can easily show them around the home without having to worry about unlocking garage doors or other normally locked items, the tenant can see the entire home easily since there will be a ton of natural light and all of the lights are on in the home, and they can feel what the property will feel like as a natural temperature they’d probably use when they are living in it.
During The Showing
Once the potential tenant arrives for their showing time, we like to:
- Welcome them into the home
- Walk them through each room of the home pointing out anything unique
- In the last room, we like to say “Feel free to walk around more and talk amongst yourselves. Whenever you are ready, I will meet you in the kitchen to go over a few more details and answer any questions.” Then I leave them so they can talk in private and explore some more.
- Once they are done, we hand them the Property Packets and review the information inside
- We explain that this is all of the information they’ve already seen in the listing and email communication
- We need them to sign the last page (the Release of Information Consent Form we discussed earlier) which says they are okay with us reviewing their background and credit check to approve them for the home
- They need to sign and tear off that last page, which we keep for our records, and then they can keep the rest of the packet
- We answer any other questions they might have (check out my other article for questions frequently asked by potential tenants)
- Then if we get a good vibe from them, we offer the home to them and say we will follow up with an official email offer that they can reply to with their answer
- If we get a bad vibe from them or have other applicants we are still considering, we say we have a few more showings then we will get back to them if they are approved
After The Showing
After the showing, we close all blinds, shut off all lights, turn down the thermostat (to 75 in the summer or 65 in the winter), and lock all doors.
We follow up with the approved applicant by emailing them their official offer letter and next steps.
In these emails, we like to include that they must:
- Accept their offer in writing within 24 hours of this email being sent otherwise we will move on to the next applicant (responding to this email is enough). We also confirm that they can move in within the next two weeks (because we won’t hold a home longer than that)
- Create an account and set up payments on Apartments.com (we manage all of our tenants on Apartments.com, so we send them an invitation to be residents of this property. They accept that Apartments.com invitation and add a verified payment method to complete this step)
- Switch all utilities into their name by move-in day (we provide a list of local utilities to make this easier for them)
- Pay all move-in funds (we total up what the security deposit and first-month rent will cost them and explain this must be provided at the lease signing in guaranteed funds (cashier’s check or money order only))
- Choose a lease signing appointment through another one of our Calendly links (this is typically a 1-hour time block that they can choose from on a day that we are available)
If they do all of those things before/during the lease signing, they will officially become tenants!
Again, all of these email drafts, editable templates, and checklists are available to you in my DIY Rental Manager Template Bundle. You can purchase these editable documents which will help you with every aspect of self-managing your rental homes. Check out The DIY Rental Manager Template Bundle here. [COMING SOON]
8. Deny Other Applicant(s)
At this point, you probably have 10-15 other applicants that did not meet your minimum screening standards. I like to wait to reply to these applicants until I have an approved applicant.
Once we have an approved applicant, we:
- Download all of the applications off of Zillow and Apartments.com and store them in our Google Drive (this is for protection in case anyone ever comes back to say you discriminated against them)
- Email each denied applicant an Adverse Action Notice letter (this letter says why they were denied and which credit bureau they can contact regarding anything that showed up on their credit report
For more help on what to include in a Tenant Application Decline/Adverse Action Notice letter, check out my other article.
In most states, this letter is legally required to be sent to denied applicants so they can know why they weren’t qualified. In most cases, we never hear from these applicants again because they already knew they didn’t meet our minimum screening standards and applied anyway.
We also download the application of the approved applicant and add that to their new tenant folder in our Google Drive, so we can always have that on record as well.
9. Schedule The Lease Signing Appointment
When the approved applicant follows your Acceptance Email checklist, they should be using a Calendly link to schedule the lease signing appointment.
Throughout the next week, they might follow up with you via email regarding some of the tasks if they have any questions. Otherwise, they should let you know when they’ve completed each task and that they will be ready with the move-in funds prior to the lease signing appointment.
In the meantime, you need to prepare all of the lease documents.
For more help on the full lease signing process that will help ensure a smooth lease signing, check out my other article.
10. Attend The Lease Signing
The lease signing is the final “big task” you have to prepare for and complete to wrap up this unit turnover. There are a few documents you need to prepare prior to attending the lease signing.
Before The Lease Signing
Before the lease signing, we always:
- Fill out a lease with the tenant name(s) and contact information, security deposit, rent price, utilities and appliances included, and who is responsible for lawn care/snow removal
- This also includes filling out any Pet Addendums, Cosigner Agreements, Lead-Based Paint Disclosures, and Rules and Regulations for the property (for more information on what documents you need for a lease signing, check out my other article)
- Print off 2 leases with all of the supporting addendums/agreements
- Print off 1 Lead-Based Paint brochure (if the property was built before 1978 – you can find one of those to download and print here)
- Print off 1 New Tenant Orientation packet (this is the summary of the important points of the lease that we read instead of going over each line in the actual lease)
- Print off 1 Move-In Move-Out Inspection Report (you will keep the report and send a copy of it to the tenant after the lease signing)
- Put 1 unsigned lease, the New Tenant Orientation packet, and a sticky note with the door code in a folder that the tenant can take home with them (they can review this information directly after the lease signing until you have time to email them their copy of the signed version. This also looks super professional.)
- Bring multiple pens
- Confirm with the tenant that they have:
- Set up payments on Apartments.com
- Switched all utilities they are responsible for into their name
- All of the move-in funds as a cashier’s check or money order
- They will be at the lease signing appointment
- Show up early, turn on all lights, and adjust the temperature (like we did for the showing appointment)
- Fill out the Move-In Move-Out Inspection Report (we fill out any defects in the property and review them with the tenant during the lease signing before they sign it to save some time.)
For more help on what to include in a New Tenant Orientation packet, check out my other article.
During The Lease Signing
At the lease signing, we often sign all of the documents at the property on the kitchen counter.
We first review the New Tenant Orientation that highlights how rent collection, late fees, maintenance requests, tenant-billable expenses, and renter’s insurance work. This is a 4-5 page document that summarizes the most important parts of the lease in layman’s terms.
After that, we review the lease to verify that the tenant name(s) and contact information, security deposit, rent price, utilities and appliances included, and who is responsible for lawn care are all accurate. As we work through each page, we have the tenant initial the bottom of the page so we can guarantee they’ve “reviewed” this page.
We also collect the move-in funds at this point and initial on the lease that we’ve received the move-in funds from them. This part of the lease acts as their receipt for paying these funds.
Then we supply them with a Lead-Based Paint brochure if the home was built before 1978 (because that is legally required in most states as well).
Finally, we review what we wrote down on the Move-In Move-Out Inspection Report and have them initial each page and sign the last page saying they understand the condition they are receiving the property.
Once we’ve signed all of the pages of the lease, we congratulate them, hand them a copy of the key and a sticky note with the door code on it, and tell them we will be emailing them a copy of all of the documents they signed later today. Then we leave the property.
Congratulations! You have a new, great tenant!
11. Deposit Move-In Funds
After the lease signing, we take the move-in funds to the bank. We have different accounts for security deposits, maintenance expenses, property tax and insurance, and more to make sure we always have plenty of cash on hand.
Check out our other article that fully outlines how we set up bank accounts to make managing the money for the rentals easy. [COMING SOON]
12. File All Documents
Finally, we go home and scan all documents onto our computer using our phone (iPhones have a built-in document scanner and Androids can download a free PDF scanner app that lets you scan any piece of paper onto your phone).
We then upload the signed lease into our Google Drive, on the tenant’s Apartments.com account, and we email a copy to them along with a second congratulations and a copy of the New Tenant Orientation letter. We also use Stessa, so we upload their document there as well.
To see how we organize all of the documents we gather from our tenants on Google Drive, check out my other article here. [COMING SOON]
Then you’re officially done! You’ve placed a good tenant into your rental property!
Final Thoughts
Every time we have a tenant leave one of our properties, we follow this exact list to update/repair and clean the unit and search for a new, qualified tenant.
We’ve found that the more patient we are with this process, the better the tenant we end up finding. And when we skip steps of this process or rush anything, we end up with a more “high-maintenance”/harder-to-work-with tenant.
I hope you find this article useful and that it helps you find your next great tenant for your rental property!
Catch you in my next post!
Related Content
Check out my recommended tools, templates, and resources to free up your time from constantly working on and worrying about your rental properties. My husband and I use these tools to self-manage 18 rental units (and counting) for only 5-10 hours a month.
Keep in mind that most of these items are either free or reasonably priced for the amount of value that they provide. My goal on this page is to recommend tools, templates, and resources that we use daily and wish we had known about at the beginning of our landlord journey. Since implementing them, they’ve saved us countless hours and tons of headaches.
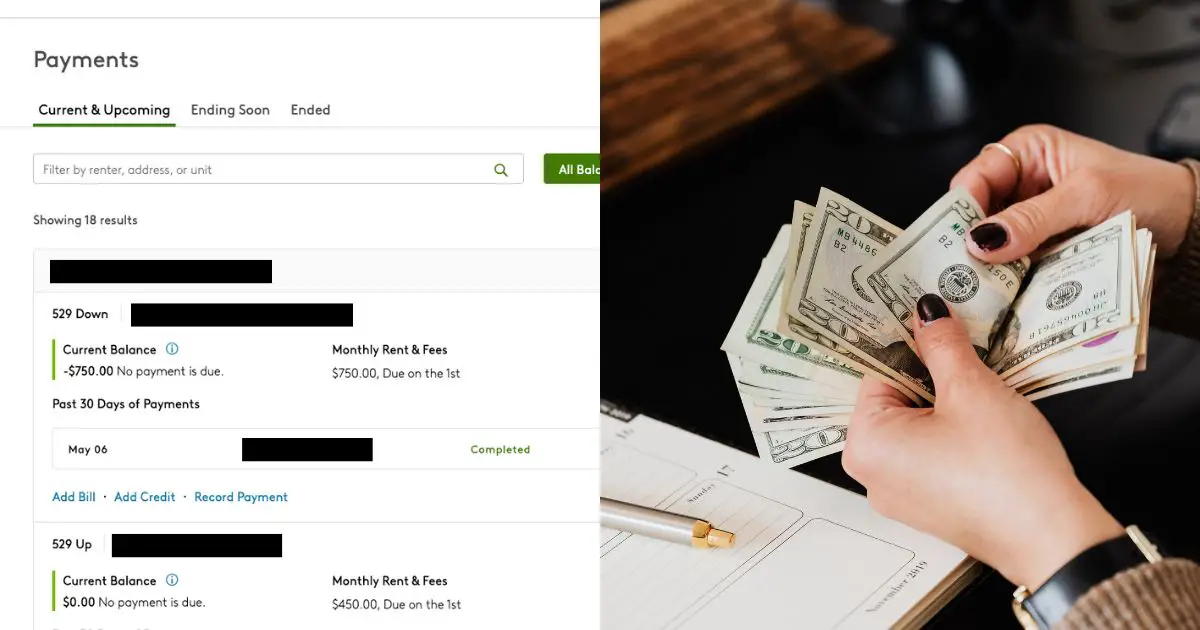
Collecting rent on time (and charging late fees if it’s not on time) is an important part of the puzzle when self-managing your rentals. The last thing you want to do is listen to the 17th sob story on why a tenant just can’t pay the rent amount on the first of the month (even though they know it’s coming every month).
Since we put our rent collection on auto-pilot, we’ve consistently collected all of our rent (plus thousands of dollars extra) each year with minimal effort (and very few sob stories). To learn the system that lets us make rent collection easy, check out this article.


By Christine
Christine is a blogger and real estate investor/property manager who self-manages 18 rental units (and counting) alongside her husband, Adam. Although she successfully automates the management of her rentals and pockets the property management fee now, her path to success was not easy.
Go here to read her story, “From An Overwhelmed First-Time Landlord To A Pro Investor Self-Managing 18 Rentals On Less Than 10 Hours Per Month“.
Recent Posts

How To Reject A Tenant Application (With Examples!)
When you start to accept applications for your rental property, you’ll inevitably get some applications that do not meet your minimum screening standards (even if you list them in the listing, some people just don’t read or don’t care). When this happens, you’ll have to carefully review the application and send back a Tenant Application…

How To Write A New Tenant Welcome Letter For Your Rental Property
When we have found a new tenant that we are ready to sign a lease with, we want to start the new relationship off on the best terms possible. In order to do that, we need to ensure that they are familiar with the most important details of the lease. We do this by providing…
Ultimate Guide To Collecting Rent And Charging Late Fees As A Landlord (Easy System!)
Collecting rent from tenants is one of the most time-consuming (and emotionally charged) parts of being a landlord. Not only will you get every excuse under the sun about why rent will be late this month (again), but you will also miss out on opportunities to collect extra income and increase rent over time if…